Thursday, 29 September 2016

Lessons from my Father-Knight

So, it's been 3-4 weeks since the madness began and our gaming took on a futurist twist. Being the Hyperpower I have naturally led the way, not being sidetracked by indecision or curtailed by distance or university. As a result the collection has grown by a smidge (OK, smidge and a half...) to the following:
Joan of Arc (Limited Ed), Father-Knight, 2 ORCs, 2 Nisse Snipers, Nisse HMG (with bewbs), Nisse Combi-Rifle, Knight of Santiago with Spitfire, Order Sergeant with Combi-Rifle (no bewbs), a Black Friar with Multi-Rifle, a cosplayer Neoterra Bolt, 2 Akali Commandos, Squalos, Fusilier special weapon box, 6 generic Fusiliers, Lt Stephen Rao, Bagh Mari box, Bulleteer box, Scylla, Deva, Miranda Ashcroft and Konstantos.
I've fallen behind on my intended painting but what I have done I am pleased with so far:


The colour scheme is working well, and whilst some (no names Sean!) have expressed distress at me using the 'stock' colour scheme, I am happy with it as I wanted the force to be obviously PanO and I do find that at times in Infinity it is difficult to tell the models apart, especially if they are unpainted (Mobile Brigada and ORCs as case in point). I'm really pleased with them so far, my Father-Knight's robe isn't turning out as hoped but it has a white undercoat which has not lead to the same finish as the rest. I'm fairly happy with the bases but I had to go back over them as they did not turn out as expected the first time I did them. The lesson I learnt was that you should use a much darker colour to paint the base (Rhinox Hide), then use the textured paint (Martian Ironearth), wash it with a wash that is as close to the textured paint as possible (Seraphim Sepia), drybrush with a dry paint of your choice (I used Kindleflame), then a dark wash (I used Agrax Earthshade). 
I've had a good few games with them now, mainly using variations of a Fusilier list. I beat Sean, lost twice to Ben's Yu Jing, beat Ben's USAriadna, lost to them, and beat Rory's Combine Army. So, what have I learnt?
Firstly, if you aren't using a Sectorial List then you need 'cheerleaders' to generate orders as having a force where everyone needs their orders won't work as if someone gets poor positioning or fails to drop something important then the force will grind to a halt. I found this against Ben's USAriadna when I lost as I was unable to move my two 'pincers' up to pin pieces in place. This led to Ben picking off certain key members due to me being unable to cover areas effectively.
Secondly, make sure you know what your 'big' pieces do. Father-Knights, Bagh Mari mine layers, hackers and models that can use Suppressive Fire all fall into this categories. Mine layers can place a mine before the game starts, Father-Knights have kinematicka, hackers can ARO if a remote with a Repeater is attacked with their programs, and Suppressive Fire is often more effective than direct fire. Knowing which weapons are good uses of your SWCs is another key point; a Nisse eating up 1.5 of them on a sniper rifle may not be the best use whereas a Bagh Mari mine layer in a fire team with one is a far better use of them. 
Buy models towards an aim. I have managed not to do this and thus have a little from each Sectorial rather than a strong force from one. There's no point in buying a Super Fire Team Of Doom (tm) if you are playing VanillaOceania as you don't get the use out of it's rules and in all likelihood will not them take all of your shiny new toys.
Learn what models and weapons do. Ben's Ariadna are so backwards that they insist on using single-shot rifles at every opportunity... (hur hur hur)! I forgot about most of my Black Friar's equipment, as well as Suppressive Fire on everything, Mimitism, and speculative fire on Drop Bears. These things will change games and are what makes tournament-level gamers rather than  casual gamers. I'm not meaning this in a way of 'learn the rules so you can be a dick to folks' but rather 'learn the rules so that you can play the game correctly'. Both players will enjoy the game more if you aren't spending half the game with your nose buried in the rule book.
Until next time, enjoy your gaming and respect the Hyperpower...

Saturday, 24 September 2016

Escalation Week 1: The Black Tide

After a whole two practice games Martin and I decided to take part in the local Escalation League, kicking off in our local store, ABZ Games.

This would be using the Escalation Rules in Season 8's ITS rules.
We would be playing each other, partly due to time constraints, as Martin was working until 1400, and I had just came off nightshift, so could do with some sleep!

Game 1 was to be 120 points with no Lieutenant. This would be the perfect chance to try out my freshly built and undercoated USAriadna.

At this point I only have the starter army box, with limited edition dismounted Maverick, so I would just select from there.
I went for:


I chose to try the non-Devil Dog part of the box, mainly as I ran out of superglue and then the Dog fell off his base...!
My copy of the set came with an extra flame thrower for the Marauder but no arms for the third Grunt so I decided I'd switch him out and use the Dismounted Maverick model as a Grunt Paramedic, which Martin was ok with. I paid to upgrade the Minuteman to an AP rifle, with X-Visor and Marksman L1. He would be pricey but I felt the option for AP combined with Shock from Marksman would do me wonders, plus I had the few points left over.

Martin had:


He seems to be fond of the Fusiliers, which I was steadily starting to dislike! The Akal wasn't in his courtesy list as he kept it back for and Airborne Deployment.

Board:


I lost the roll off for deployment, so Martin chose to pick turn order, so I picked sides and let him deploy first. 

He spread his Fusiliers out across the board in pretty punishing firelanes, and then placed his Bolt in the top right quarter. Everything was in cover for him, and it looked like I may need to go on the offensive to flush him out. With a plethora of flame weapons, this wouldn't be uncharacterful!

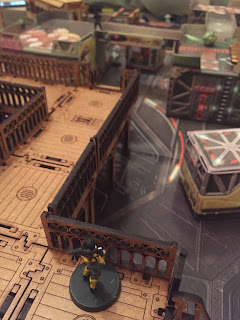
I spread my Grunts out in the left side of my deployment zone (bottom table edge, in image), with one on the rooftop walkway, the Paramedic in the centre behind the small rectangle scenery/trough? and the third Grunt in the open (didn't see a firing lane he had set up - whoops!). The Minuteman deployed on the stairs of the walkway on my right, the Marauder Forward deployed behind the bigger trough slightly further forward. The Maverick started beside the base of the right walkway. 
I used the Infiltration of the Foxtrot to deploy in Camo behind the central generator.

Would have been easier to take pictures like usual!

Turn 1: Martin elected to go second, which I was not expecting, allowing me to try to save the Grunt I had in the open. I choose to go Impetuous with the Maverick, moved up and popped smoke, provoking an ARO from the Missile Launcher and the Bolt, everyone missed!
The Marauder shot and wounded a Fusilier (as we would be both using Medics, this was a new experience) which became unconscious. This allowed me to move my Grunt into cover.


The Grunt on my left walkway moved and shot at a Fusilier, provoking an ARO and the Fusilier plugged him, sending him unconscious too!


In Martin's turn he attempted to shoot the Missile Launcher at the Maverick, who succeeded the F2F roll and dropped some smoke between them. This succeeded in blocking LOS to the Maverick from the Missile Launcher, and also from the HMG to my Foxtrot, which had unveiled in my turn to little effect (forgetting that Rifle's have Burst, I was only rolling one dice!).
He moved the Bolt into cover behind the Phone Box? giving him a great LOS to my Maverick, he dropped a mine at this point. 

Turn 2: The Maverick, sensing an opportunity to Boarding Shotgun the Bolt moved up, only to move into Zone of Control of the Mine, which blew her sky-high! Sad times! 
In a sulk I moved the Marauder up to try and Heavy Flamethrower the Bolt, the first order was spent using the rifle, where we both missed, the second I was in range for the Flamethrower, but Martin succeeded his dodge. 
Running low on orders and needing to try to heal my downed Grunt (the mission was to kill as much of the opponent whist keeping as much of my stuff alive - anything unconscious counted as dead at end of game), I used the Foxtrot to shoot the Missile Launcher, wounding it and sending it unconscious, clearing the fire lane to allow the Paramedic to move towards the base of the walkway. 
Then as at this point I had forgotten about the Minuteman, I spent my final order to move it onto the walkway and hopefully be able to deal with the Bolt next turn.
At this point I was pretty chuffed with how the game was going, I had taken down 3 Fusiliers for only the Maverick and a Grunt, to be slightly ahead on points, I also had some ok firelanes to hopefully deal some damage on Martin's turn.

As I was expecting Martin's Akal turned up, opting to use the flank to move on, coming into the Minuteman's zone of control. I managed a change of face to give me an ARO if he decided to spend orders on him later. 
He started by shooting the Foxtrot with a Fusilier and did 3 wounds, killing him outright! His Trauma Doc then succeeded in reviving the Fusilier I had shot in turn 1. 
The Akal then opened up, shooting my Grunt twice (with no cover and out of arc, so no ARO, eek) and my Minuteman, thankfully the Minuteman won the F2F using his Pistol (+3 range band over the AP Rifle) and dropped the Akal, using Shock from Marksman Lv1. The Grunt passed both her saves.

Turn 3: I moved my Minuteman up and spread my fire out across the Bolt and a Fusilier, I won both F2F's, unfortunately the Fusilier saved, and due to the Shock from Marksman, the Bolt used Bio Immunity to use her BTS instead, but still took a wound. 
The Paramedic made a mad dash to the unconscious Grunt, provoking an ARO from a suppressing fire HMG and a Combi Rifle Fusilier, I managed to save all 4 wounds, then succeeded my roll to target the Grunt with the MedKit, before rolling a 20 on the PH roll and killing him! It had been going so well too, looking like a heroic feat, only to banana skin at the last moment!

Martin's Trauma Doc took up most of his final orders, moving and then succeeding to revive the Missile Launcher, all whist staying out of LOS!
The Missile Launcher Fusilier then stood up and rocketed the Minuteman with an explosive, which he failed all his saves and died, clearing the way for the Doc to run through and revive the Bolt.

It was a comprehensive victory for Martin, he killed 77 points worth of my force scoring 3 VP for the League, whilst keeping alive of 90 points worth of his troops, scoring a further 5 VP.
I managed to kill a measly 22 points, scoring 0 VP, and had 43 points worth remaining, scoring a solitary VP.

Not the greatest start!

The aftermath:


We do have achievements available, I got the following:

Black Tide: Play with a fully primed army.
Flatline: Kill one of your own models with a doctor or paramedic. 
I find your lack of faith disturbing: kill a model that has the “religious troop” skill.
It will not die!: Successfully make 3 armor rolls with one model in one turn.
Pistolwhipped: Kill an enemy model with a pistol.
Rule breaker: Violate the concillium convention.
We are the rock on which the enemy breaks: Kill more models with AROs than in your active turns.

So onto next round, I have ordered the Grunt Special Weapons box, and a set of Mavericks, as well as trading some of my Yu Jing for a Van Zant (not sure I can use him for a few rounds, as I'm sure I read about characters in the pack somewhere).

Hopefully will have some painting soon, I sorted out the colour palette I want, now just to pick them up!


Take 2, and the perils of rulebooks!

So Martin and I had a rematch with his PanO versus my Yu Jing. This time we went for 200points. Yet again just playing a straight up kill the opponent in 3 turns, with no hackers so we could get down the basic rules.

We increased the gaming board to 4x4' with a few more pieces of terrain (I think), we kept the board the same as one which Martin and Sean had just played upon, as there were no particular issues with it, plus we were a bit pushed for time.

The Board:


I had:


I decided to try out the newly built Aragoto and Asuka, mainly as they were new! I was a bit unsure of how to use them, other than try not to get them gunned down early, and hopefully they would do a bit of damage. The rest of the force was just from the Red Veil set, as I was still awaiting the arrival of a few more miniatures. I chose the Hsien to be my focal point for damage, decided I would keep the Tiger Soldier and this time try to use for a combat drop. This was in part as I thought it may be unexpected with the size of the force using the Aragotos. I took 3 Zhanshi to bolster my orders.

Martin had:


I won the roll and opted for second turn. Martin picked deployment and chose to set up second. We remembered to keep a model back this time, I went for a fairly balanced deployment. I had the Zhanshi and a single Aragoto on the right side. The other Aragoto on the left (shortly to be joined by Asuka), with the Hsien behind a sushi bar in the centre, with the final Zhanshi just behind him. This Zhanshi was carefully placed to offer some fire support whilst being relatively hidden, perhaps Martin would walk into a trap if he couldn’t see him (unfortunately this backfired, as it was me who forgot about him for a large part of the game)!


Martin went for a relatively spread out set up with more weight towards my left flank. He also had suspiciously few models set up...


Turn 1: 
One of the fusiliers moved up and was dropped by a long range combi rifle shot from the Zhanshi in the centre. This was off to a good start! Martin then was more cautious and the rest of his force moved into good firing spots and the turn passed uneventfully.


I opted to take my Impetuous Orders, with the belief that extra movement would benefit me in the long run, and perhaps a slightly exaggerated belief in their survivability. Asuka moved up and took an ARO from an ORC, and a Fusilier with Missile Launcher (I had overlooked when planning my move!), unfortunately she didn’t survive this onslaught! This was too foolhardy a move, and I didn’t realise how fragile the Impetuous/Motorcycle's made them. The lack of cover bonus made her really vulnerable, and I realised how poor my deployment of her was, as any movement would have resulted in her demise due to Martin setting up firing lanes. We did foolishly believe at this point she just dismounted, so we ended up playing with her for a further turn in which she inflicted a wound, however it was fairly simple to rectify, and I think I only spent one order on her so it wasn’t too costly a mistake!
I would like to say that I was slightly more careful with the second Aragoto, however he ended up moving as close as he could, due to Impetuous, declaring shoot as his second short skill, but neither he, nor the Fusilier or ORC managed to hit with their shots, so he survived this turn!
On the other flank the Aragoto with the Spitfire moved up and poured shots into a Nisse, dropping it.


The Hsien managed to kill the Fusilier with the Missile Launcher.


Turn 2: 
Martin brought an Akali Commando on either side, out of arc from my Zhanshi and Aragoto's. The Spitfire wielding Aragoto was killed by the subsequent order (the Ninja was the 'dismounted Aragoto, before we realised our mistake)!


On the left flank the Aragoto managed an about facing as an ARO to Martin's shot, hopefully allowing me to fire back when he spent another order on it. I was out of LOS to the ORC with him, so I wouldn’t be sacrificing shots against it.


The Nisses with HMG moved into LOS of my first Zhanshi and took her down. This left me with just a single Zhanshi at that side (my Lieutenant!).


The Neoterran Bolt moved up but survived the ARO from the Lieutenant.

On my turn I spent my Lieutenant Order, to shoot at the NeoTerran. Thankfully I was out of LOS of the Nisses, and survived the ARO due to height to the Akali, so I managed to take Bolt out.


She then spent a following order to move into LOS of the Akali and take it out.


The Aragoto moved up to the ORC and managed to get close enough to use the +6 from the Light Shotgun. Inflicting a wound. I had hoped to kill it off with the Tiger Soldier who's drop had scattered, but the ARO resulted in the death of the Tiger Soldier on the following order.


The ORC was taken out by the Hsien, putting Martin on a Loss of Lieutenant.


Turn 3:

Not much left for Martin, just a Nisses HMG, who took out my Lieutenant.

In my turn I was on irregular orders, I moved the Hsien and took out the Nisses, ending the game.


Another brutal game with a lot of deaths on both sides. I feel that my tactics will have to improve, but at the moment the chance to provoke an ARO to then get more of a hang of the mechanics seems to be a bit too difficult to resist!

We are about to start an Escalation League through the local store, and our first game (against each other!) will be for 120 points. With this in mind I had a few things planned, unfortunately one of these was to buy the rulebook (I prefer it than using Acrobat on the Laptop). The books are really nice, although it should come with a warning/disclaimer to ward you off reading other faction background! After reading up on the Ariadna, I decided I had made a massive mistake and picked the wrong faction! To this end I bought the USAriadna army box, which I have decided to use instead! Hopefully this is my first and last faction change, but the models were so nice to build (other than a few missing pieces, which have warranted an email to Corvus Belli), I feel I have made the right choice!

Will hopefully get some pictures of them up soon, possibly with a painting guide once I have started!

Wednesday, 21 September 2016

All aboard!

On Monday, Martin and I played our first game of Infinity (well my first, his second), with his PanOceana versus my Yu Jing.

Our orders haven't turned up as yet, so it was just going to be a small game to familiarise ourselves with the rules, and try out our starter sets.

We had a points limit of 180, although I'm not sure if either of us quite had that much, I was using the contents of Red Veil without any of the fancy Hacking devices!

I had:


Martin had (I think, the ORC may have had a Combi Rifle - will seek clarification!):


This was our table:


Martin rolled a critical for his initiative roll so decided to take first turn. I got to chose deployment zone, so I chose the Mag-Train station, and let Martin set up first.


My Crew/Warband/Unit/Faction? and then deployment:


I had opted for setting everyone up, (I'm not sure if we forgot about holding a model back, or if we just decided to place everything? To keep things simple I decided not to use AD: Combat Jump on the Tiger Soldier, and deployed her at the same time. My lieutenant was the Zhanshi with the Combi Rifle in the air, as it was my only fully painted model!
I had been quite cautious with my deployment, keeping most of my models in cover/out of line of sight. The Hsien was behind cover but would hopefully have a relatively commanding view of the battlefield.

Turn 1: Martin unveiled his Lieutenant (the female Fusilier, allowing him an extra order for her which he used to bring her up on my right flank. His models all advanced (the Bagh-Mari was using Advanced Deploy, so stayed off the board). As everything was hidden away, ARO's were at a minimum, I did get a single ARO from a Zhanshi on his ORC, in which I inflicted a wound (we forgot about Guts checks, so there was no further action).

On my turn I decided against unveiling my Lieutenant and kept her out of sight, I spent my first order to move the Hsien into line of sight of his Nisses, to try to take out the sniper. Unfortunately as I was briefly out in the open, I lost the face to face and suffered a wound, not a great start! I then spent a second order to shoot the Nisses again, this time as I had made cover with the previous order I would hopefully have the edge due to burst, and I succeeded in killing it (although we only realised yesterday we had missed the bonus to armour for cover, so this was perhaps easier to kill things than it should be!).

I then foolishly tried to move the  Zhanshi beside the Lieutenant into a move advantageous firing spot, opting a move-move. This provoked an ARO from the ORC who gunned him down mercilessly as I was in the open - whoops!

At this point I became a bit more wary and spent my last orders moving a few models up, and the TO camo marker (I'm sure Martin had no idea what this marker could be out of all the Camo models I own...).

Turn 2: Martin decided to bring his Bagh-Mari on using a flank, instead of Combat Jumping, unfortunately (and rather madly!) he came on at the side with the Tiger Soldier and the Zhanshi, both of whom had LOS and ARO'd to shoot him down.


He then brought the Father-Knight up to a corner out of LOS, then with another order came round the corner and attacked my Zuyong in CC, who was the only model that could ARO, Martin with CC23 or something insane, chopped down the Invincible...(lived up to that name!) before moving behind a pillar.


On my turn I decided to try out the Ninja, who set upon a game of hunt the Lieutenant and snuck round the corner and shot with the Tactical Bow - turns out despite being an awesome looking model, the Ninja isn't a great shot with the bow and both Martin and I failed our F2F. I decided to take a further order, and on the second attempt I assumed the roll of a budget William Tell and shot her in the face!


Martin would be on Loss of Lieutenant next turn (which would mean lots of reading through rulebook!). 
Next my part painted Zhanshi moved up and shot a Fusilier, taking him down with her Combi Rifle. 


The Hsien then moved to try to take down the Fusilier with the HMG. Unfortunately it went in Martin's favour and I lost him to the ARO.


I had unveiled my Lieutenant as I felt Martin was going to kill her anyway, and used her order to about face to hopefully get a ARO off against the Father-Knight. Unfortunately there wasn't anywhere that I could move her that would get me another model in LOS due to the death of the Hsien, so I resigned myself to the necessity for a battlefield promotion!

True to form the Father-Knight charged into the Zhanshi Lieutenant and butchered her!


The ORC then moved and shot at the Tiger Soldier, but lost the F2F and died! Leaving just the father Knight and Fusilier HMG.

In my turn also being on Loss of Lieutenant I only had irregular orders, I spent the Ninja's, to move and then shoot the HMG, thankfully I was out of her field of fire, and so she could only declare a change of facing? which resulted in the Ninja scoring another kill.


I then used the Zhanshi to move into LOS of the Father-Knight, winning the F2F and killing him, scoring a victory to the Yu Jing! (unfortunately I seem to have forgotten to take a photo).

We missed a few key rules, which I'm sure we'll iron out for next battle (hopefully tonight), the game was great fun, a lot died and it was pretty fast paced. We were only playing on a 3x3' board, and I think we will look to extend this to 4x4 once we get organised. 
I felt the rules were pretty straight forward to pick up, and hopefully once we start getting some new models, we can start experimenting with some Hacking. 
The scenery painting is starting, so this will make a big difference to the look of the game, and Martin his pushed on painting a few new models. I've just put together my next addition, a large part of why I chose Yu Jing, the Aragoto Senkenbutai with Asuka Kiraragi!